Basic Thread Dimensions
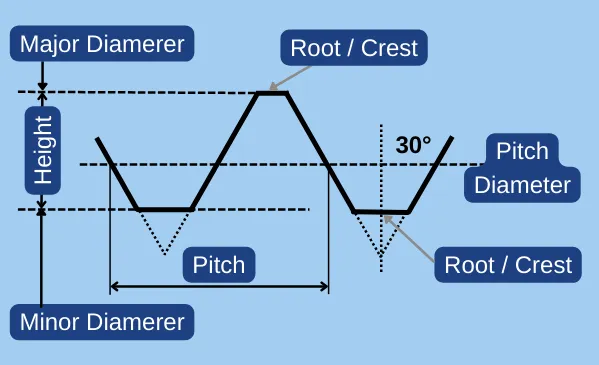
| Property | Inch | mm |
|---|---|---|
| Nominal Diameter | 2.625 | 66.675 |
| Pitch (TPI) | 6 | |
| Pitch (Distance) | 0.1667 | 4.234 |
| Pitch Diameter | 2.5167 | 63.924 |
| Minor Diameter | 2.4265 | 61.633 |
| Thread Height | 0.0902 | 2.291 |
| Addendum | 0.0541 | 1.374 |
| Crest (External) Root (Internal) |
0.0208 | 0.528 |
| Tap Drill Size (75% depth) |
2.462 | 62.55 |
| Lead Angle (Single Start) |
1.21° | |
| Thread Family | Unified Constant Pitch 6 TPI (6-UN) | |
| Relevant Standards | ASME B1.1-2003 | |
| Equivalent MetricThread | M68 X 4 |
For more threading data scroll down, or use the Thread Calculator
Choose the Threading Data you want to explore
2 5/8 - 6 6-UNPossible Thread Classes
2 5/8 - 6 6-UN 2A (External)
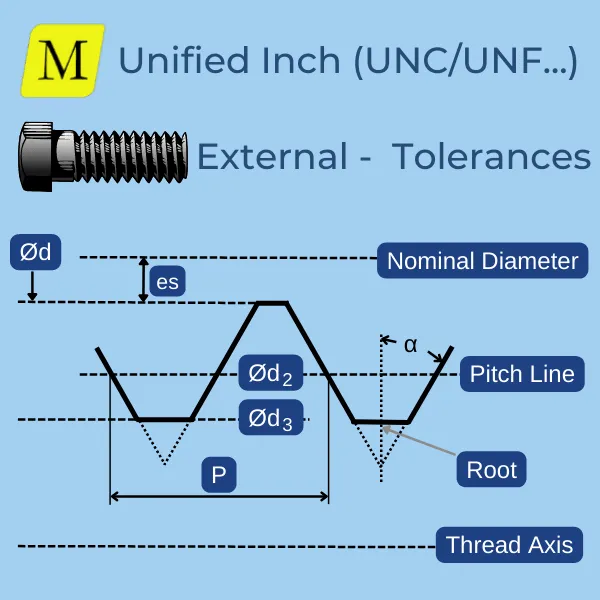
* Permisable values for thread Class 2A
| # | Description | Value (Inch) | Value (mm) |
|---|---|---|---|
| es | Allowance | 0.0024 (Ref) | 0.061 (Ref) |
| d | Major Diameter | 2.6044 - 2.6226 | 66.152 - 66.614 |
| d2 | Pitch Diameter | 2.5063 - 2.5143 | 63.66 - 63.863 |
| d3 | Minor Diameter (UNR Only) | 2.4241 (Ref) | 61.572 (Ref) |
| α | Varation of 30° anngle (+/-) | 0.6667° | |
| P | Varation of pitch (+/-) | 0.0023 (Ref) | 0.058 (Ref) |
* Values are calculated for Length of engagement of 5xPitch. For calculations of different engagement length use the Thread Calculator'
* Back to Thread Class Selection
2 5/8 - 6 6-UN 3A (External)
* Permisable values for thread Class 3A
| # | Description | Value (Inch) | Value (mm) |
|---|---|---|---|
| es | Allowance | 0 (Ref) | 0 (Ref) |
| d | Major Diameter | 2.6068 - 2.625 | 66.213 - 66.675 |
| d2 | Pitch Diameter | 2.5107 - 2.5167 | 63.772 - 63.924 |
| d3 | Minor Diameter (UNR Only) | 2.4265 (Ref) | 61.633 (Ref) |
| α | Varation of 30° anngle (+/-) | 0.6667° | |
| P | Varation of pitch (+/-) | 0.0017 (Ref) | 0.043 (Ref) |
* Values are calculated for Length of engagement of 5xPitch. For calculations of different engagement length use the Thread Calculator'
* Back to Thread Class Selection
2 5/8 - 6 6-UN 2B (Internal)
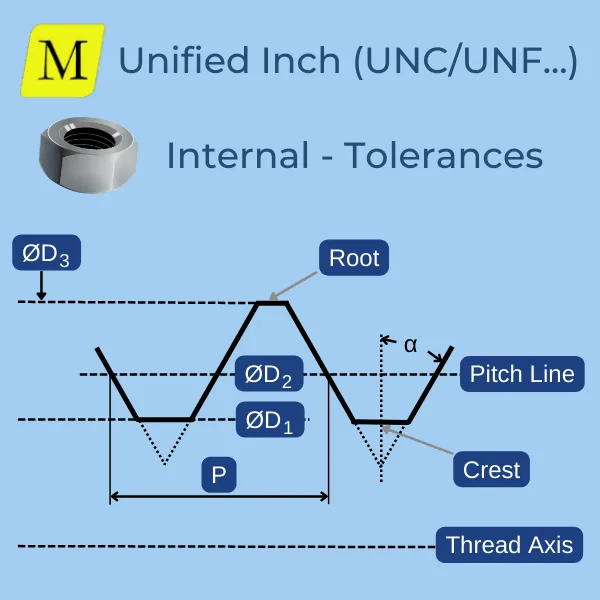
* Permisable values for thread Class 2B
| # | Description | Value (Inch) | VValue (mm) |
|---|---|---|---|
| D1 | Minor Diameter | 2.445 - 2.475 | 62.103 - 62.865 |
| D2 | Pitch Diameter | 2.5167 - 2.5271 | 63.924 - 64.188 |
| D | Major Diameter | 2.6250 (Min) | 66.675 (Min) |
| α | Varation of 30° anngle (+/-) | 0.6667° | |
| P | Varation of Pitch (+/-) | 0.003 (Ref) | 0.076 (Ref) |
* Values are calculated for Length of engagement of 5xPitch. For calculations of different engagement length use the Thread Calculator
* Back to Thread Class Selection
2 5/8 - 6 6-UN 3B (Internal)
* Permisable values for thread Class 3B
| # | Description | Value (Inch) | VValue (mm) |
|---|---|---|---|
| D1 | Minor Diameter | 2.4446 - 2.4646 | 62.093 - 62.601 |
| D2 | Pitch Diameter | 2.5167 - 2.5245 | 63.924 - 64.122 |
| D | Major Diameter | 2.6250 (Min) | 66.675 (Min) |
| α | Varation of 30° anngle (+/-) | 0.6667° | |
| P | Varation of Pitch (+/-) | 0.0022 (Ref) | 0.056 (Ref) |
* Values are calculated for Length of engagement of 5xPitch. For calculations of different engagement length use the Thread Calculator
* Back to Thread Class Selection
Over Wire Measurements for 2 5/8 - 6 6-UN
* OverWire is a measuring method to obatin the pitch diameter of threads. It is mostly used when a manufacturer does not have a Go/Nogo gauge for a thread. You can learn more about it here
| Inch | mm | |
|---|---|---|
| Permissible Wire Diameter Range | 0.0842 - 0.1684 | 2.139 - 4.278 |
| Ideal Wire Diameter | 0.0962 | 2.445 |
| Possible Wires From Standard Sets |
* 0.0962 * 0.105 * 0.1155 * 0.1283 * 0.1443 * 0.165 |
* 2.309 * 2.598 * 2.887 * 3.175 * 3.464 * 4.042 |
Once you know your wire diameter, you need to find out what is the premissable Measurement for your pitch diameter (Depending on the class). Use our Over Wire Calculator to find out!
CNC Gcode Program for Turning of 2 5/8 - 6 6-UN
The below sample Gcode is configured for:

- Fanuc Controller
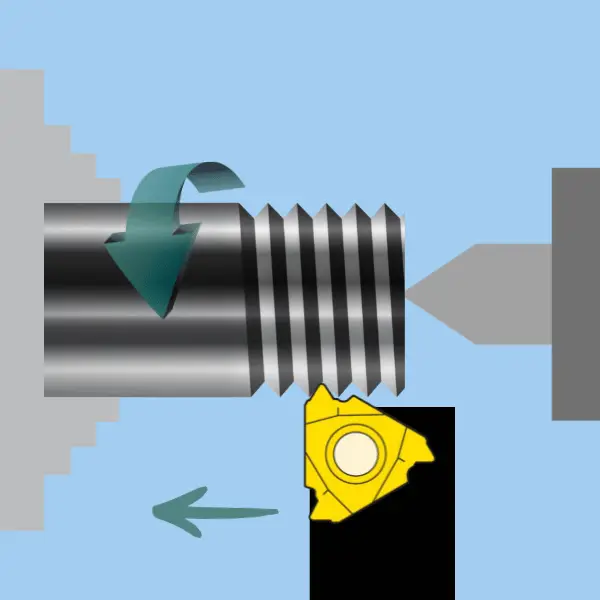
- External RH Thread
- Right hand tool, machining towards the chuck
- Flank Infeed method with contant volume
- Flank Infeed method with contant volume
- Cutting conditions for steel
- Default number of passes
You can configure all the above parameters and much more in our Thread Turning Gcode Generator
%
O0100
(MACHINING DOCTOR - THREADING CNC PROGRAM)
(CONTROLER - FANUC A)
(THREAD - D=2.625 INCH, P=0.16666666666667 INCH, L=1.6666666666667 INCH)
(APPLICATION - EXTERNAL TURNING, TOWARDS CHUCK, RH TOOL, RH THREAD)
(FEED - 17 PASSES, FLANK, CONSTANT VOLUME)
(FINISH PASS - 0.0016 INCH)
(WITH CHAMFER -  NO)
G28 U0 W0
T0101 G99 G97 S437 M03
G00 Z10.2
X 76.8 M08
G76 P010060 Q41 R0.041
G76 X61.481 Z-42.333 P2597 Q620 F4.233 R0.00
G28 U0 W0
M09
M30
%
CNC Gcode Program for Thread Milling of 2 5/8 - 6 6-UN
The below sample Gcode is configured for:
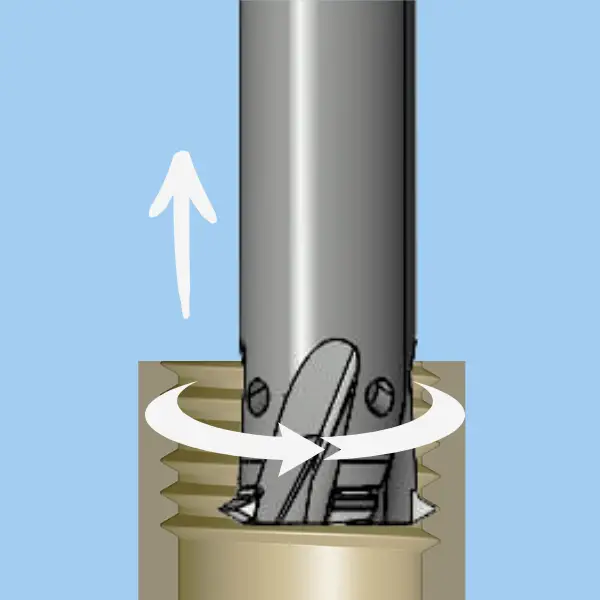
- Fanuc Controller
- Internal RH Thread
- Climb Milling
- Cutter diameter: 70% of the thread diameter
- Single tooth Thread Mill cutter
- Cutting conditions for steel
- One radial pass
You can configure all the above parameters and much more in our Thread Milling Gcode Generator
%
O101
(WWW.MACHININGDOCTOR.COM - THREADMILLING PROGRAM)
(CONTROLER - FANUC)
(THREAD - D=2.625 INCH, P=0.16666666666667 INCH, L=1.6666666666667 INCH)
(APPLICATION - INTERNAL, RH THREAD, CLIMB MILLING)
(CUTTER - D=1.3125 [SINGLE TOOTH])
N1 M06 T1
G54
G90 G40 G17 G94 G21
G00 X0 Y0 S873 M03
G43 H1 Z25.4 M08
(M-CODE "THROUGH COOLANT ON")
(PASS 1 / 1)
G90 G01 Z-42.8625 F2032
G91 G01 G41 D1 X8.3344 Y-8.3344 F133
G03 X8.3344 Y8.3344 Z0.5292 I0 J8.3344 F34
G03 Z4.2333 I-16.6688 J0 F67
G03 Z4.2333 I-16.6688 J0
G03 Z4.2333 I-16.6688 J0
G03 Z4.2333 I-16.6688 J0
G03 Z4.2333 I-16.6688 J0
G03 Z4.2333 I-16.6688 J0
G03 Z4.2333 I-16.6688 J0
G03 Z4.2333 I-16.6688 J0
G03 Z4.2333 I-16.6688 J0
G03 Z4.2333 I-16.6688 J0
G03 Z4.2333 I-16.6688 J0
G03 X-8.3344 Y8.3344 Z0.5292 I-8.3344 J0
G01 G40 X-8.3344 Y-8.3344 F2032
G90 G00 Z25.4
M30
(PLEASE NOTE THIS GCODE HAS NOT BEEN TESTED ON YOUR MACHINE AND SETUP. WE CANNOT GUARANTEE ITS ACCURACY OR COMPATIBILITY. NOTE THAT YOU ARE USING IT AT YOUR OWN RISK, AND WE SHALL NOT BE HELD LIABLE FOR ANY DAMAGES OR LOSSES ARISING FROM THE USE OF THIS PROGRAM.)
%